In this next post in this series, the data extracted using Azure Data Factory will be transformed into a readable format using Azure Databricks and adding this logic into the Azure Data Factory pipeline
If you missed it, here is a link to Part 2
Create Azure Databricks workspace
To complete this next portion of the process, an Azure Databricks workspace will have to be deployed within the subscription that is being used.
- Open the Azure Portal and search for ‘Azure Databricks’
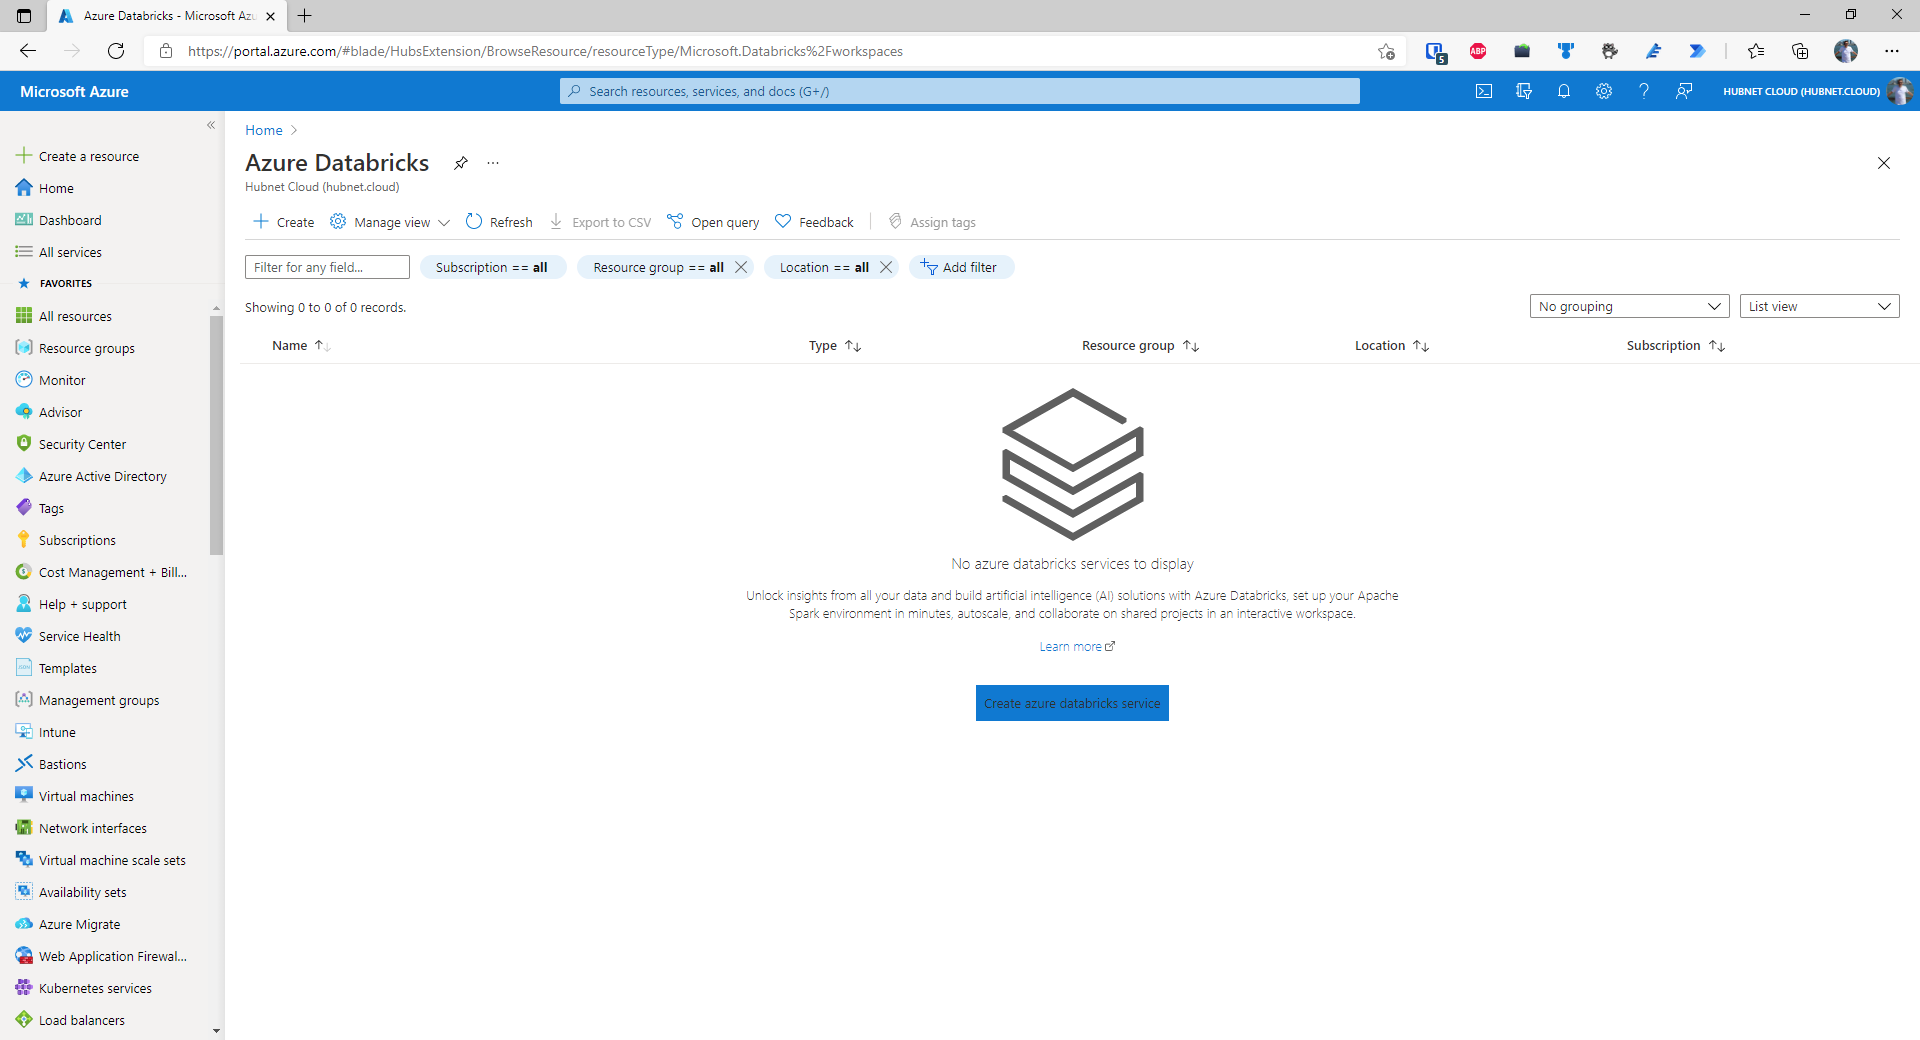
- Click on Create Azure Databricks service
- Choose the subscription and resource group where your other resources e.g. Azure Data Factory are located
- Choose a descriptive workspace name
- Choose the region closest to you
- For the pricing tier, choose Trial unless this is a production workload, then in that case, choose Premium
- Go to Review + create
- Create
Creating the service principal for Databricks to access Azure Key Vault
- Open a PowerShell Core terminal in either Windows Terminal or a PowerShell Core terminal as an administrator/or with elevated permissions
- Install the Az PowerShell module. If this is already installed, then check for updates. Press A and Enter to trust the repository as it downloads and installs the latest modules. This may take a few minutes
##Run if Az PowerShell module is not already installed
 Install-Module Az -AllowClobber

##Run if Az PowerShell module is already installed but update check is required
Update-Module Az
- Import the Az PowerShell module into the current session
Import-Module Az
- Authenticate to Azure as shown below. If the tenant or subscription is different to the default associated with your Azure AD identity, this can be specified in the same line of code with the -Tenant or -Subscription switches. To find out the Tenant GUID, open the Azure Portal ensure that you are signed into the correct tenant and go to Azure Active Directory. The Directory GUID should be displayed on the home blade. To find the Subscription GUID, switch to the correct tenant in the Azure Portal and type in Subscriptions in the search bar and press Enter. The GUIDs for all subscriptions that you have access to in that tenant will be displayed.
Connect-AzAccount
- First, set some variables to use in the following commands
##Set our variables
$vaultName = '<Enter previously created '
$databricksWorkspaceName = '<Enter your workspace name>'
$servicePrincipalName = $databricksWorkspaceName, '-ServicePrincipal'
$servicePrincipalScope = '/subscriptions/<subscriptionid>/resourceGroups/<resourcegroupname>/<providers/Microsoft.Storage/storageAccounts/<storageaccountname>'
- Create Azure AD Service Principal
##Create Azure AD Service Principal
$createServicePrincipal = New-AzADServicePrincipal -DisplayName $servicePrincipalName -Role 'Storage Blob Data Contributor' -Scope $servicePrincipalScope
- Finally, save the client id and client secret in Key Vault
##Save service principal client id in KeyVault
Set-AzKeyVaultSecret -VaultName $vaultName -Name 'databricks-service-principal-client-id' -SecretValue (ConvertTo-SecureString -AsPlainText ($createServicePrincipal.ApplicationId))

##Save service principal secret in KeyVault
Set-AzKeyVaultSecret -VaultName $vaultName -Name 'databricks-service-principal-secret' -SecretValue $createServicePrincipal.Secret
Creating the notebook
NB – There is a breaking change introduced in Spark 3.2 that breaks the code shown in step 6. Please use Databricks 9.1 LTS Runtime
(All code shown is located in my GitHub repository – here)
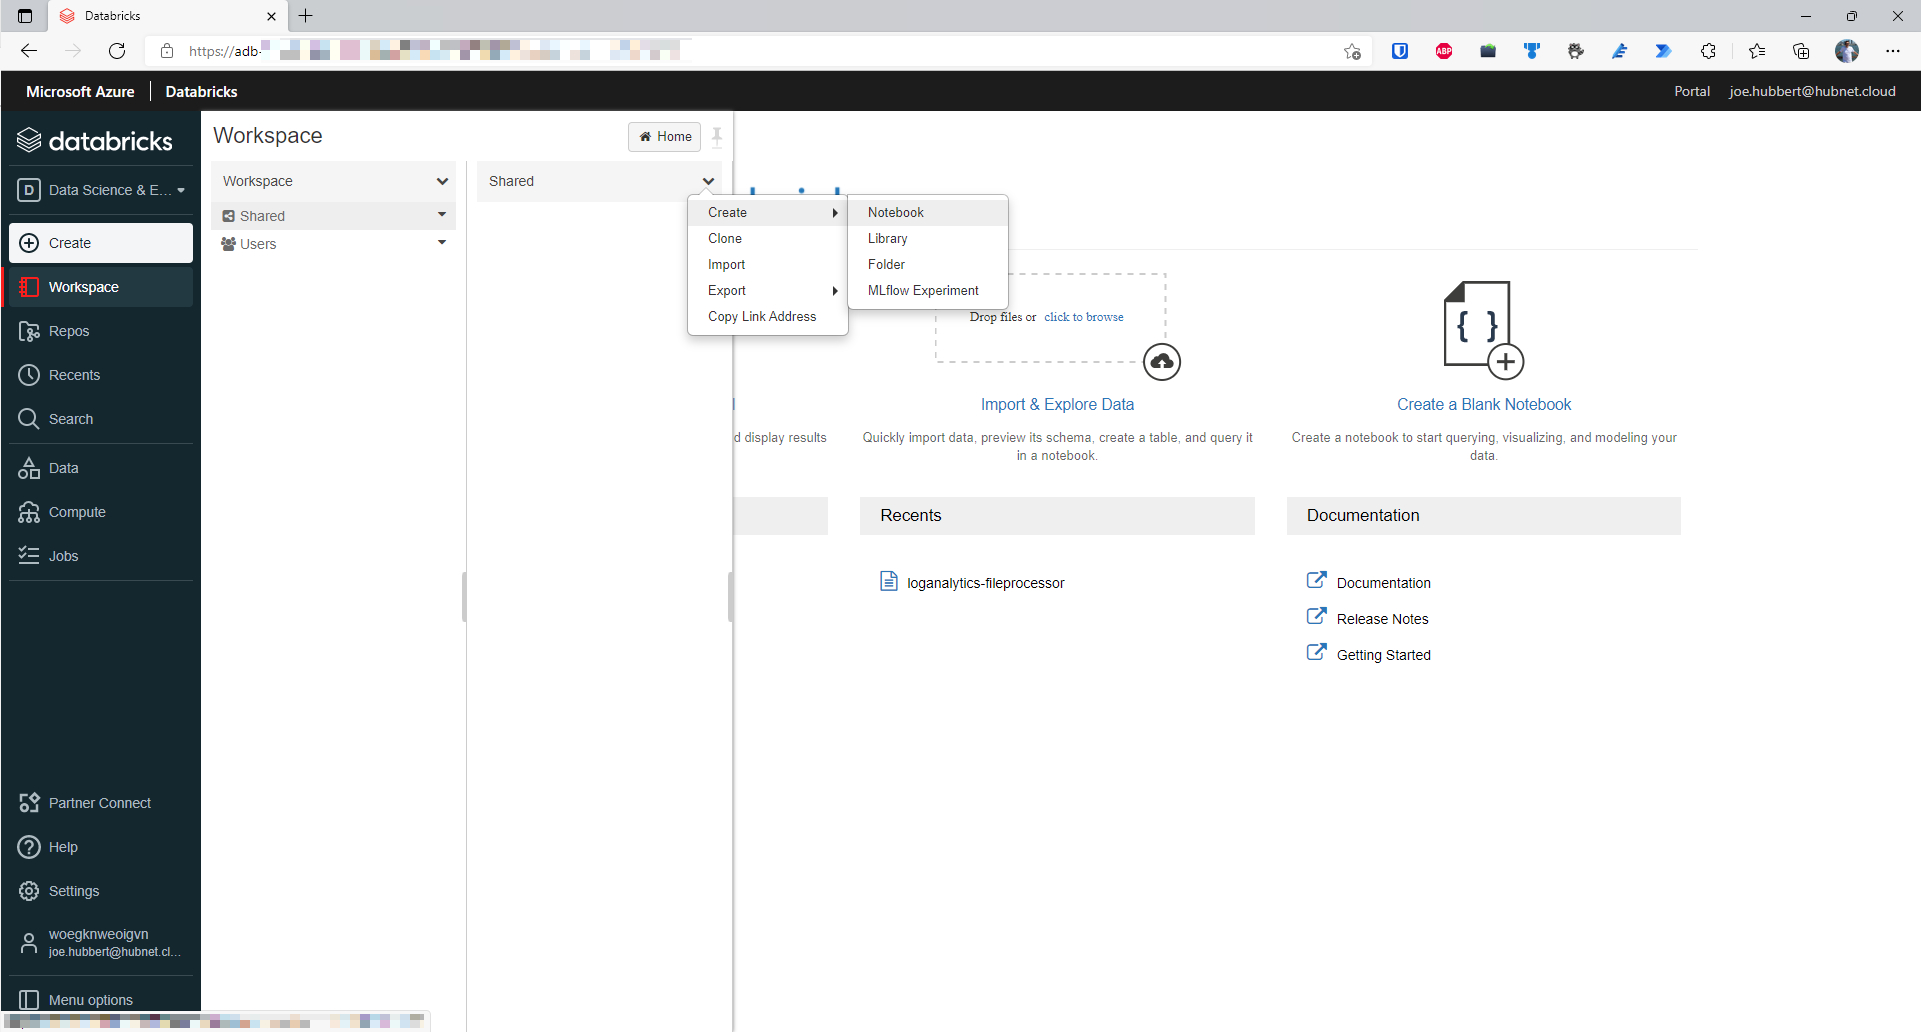
- In your workspace, expand the Workspace menu in the left pane, then open the Shared folder. In the shared folder, click on the down arrow and select Create Notebook
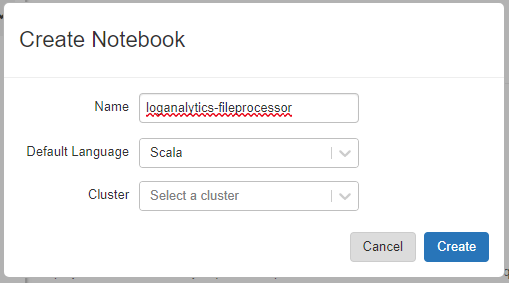
- As shown below, choose a name for the workbook. I will be using loganalytics-fileprocessor. Scala will also be the language used in this notebook so select that in the Default Language dropdown and click Create
- NB – Be careful with copying and pasting code. There may be code execution errors where extra/incompatible spacing gets pasted into your Databricks notebook. Now the notebook has been created, the first block of code can be written to make this notebook dynamic. This will enable two things. Firstly, the pipelineRunId from Data Factory can be passed in as a parameter as well as the folder path of where the file has been written to. Give this codeblock the title, ‘Parameters’ using the dropdown menu on the right hand side of the code block
//Define folderPath dbutils.widgets.text("rawFilename", "") val paramRawFile = dbutils.widgets.get("rawFilename") //Define pipelineRunId dbutils.widgets.text("pipelineRunId", "") val paramPipelineRunId = dbutils.widgets.get("pipelineRunId") - Create a new code block called ‘Declare and set variables’. Next, we need to declare the variables we shall be using in the notebook. Notice how I used the abfss driver which has been optimized for Data Lake Gen 2 and big data workloads over the standard wasbs using for regular blob storage. In this scenario, the dataset isn’t that big but performance will be noticeable when the dataset is significantly larger so best to keep with the best practice
val dataLake = "abfss://<containername>@<datalakename>.dfs.core.windows.net" val rawFolderPath = ("/raw-data/") val rawFullPath = (dataLake + rawFolderPath + paramRawFile) val outputFolderPath = "/output-data/" val databricksServicePrincipalClientId = dbutils.secrets.get(scope = "databricks-secret-scope", key = "databricks-service-principal-client-id") val databricksServicePrincipalClientSecret = dbutils.secrets.get(scope = "databricks-secret-scope", key = "databricks-service-principal-secret") val azureADTenant = dbutils.secrets.get(scope = "databricks-secret-scope", key = "azure-ad-tenant-id") val endpoint = "https://login.microsoftonline.com/" + azureADTenant + "/oauth2/token" val dateTimeFormat = "yyyy_MM_dd_HH_mm" - Create a new code block called ‘Set storage context and read source data’. In order to access the data lake, we must set the storage context for the session when the notebook is executed
import org.apache.spark.sql spark.conf.set("fs.azure.account.auth.type", "OAuth") spark.conf.set("fs.azure.account.oauth.provider.type", "org.apache.hadoop.fs.azurebfs.oauth2.ClientCredsTokenProvider") spark.conf.set("fs.azure.account.oauth2.client.id", databricksServicePrincipalClientId) spark.conf.set("fs.azure.account.oauth2.client.secret", databricksServicePrincipalClientSecret) spark.conf.set("fs.azure.account.oauth2.client.endpoint", endpoint) val sourceDf = spark.read.option("multiline",true).json(rawFullPath) - Create a new code block called ‘Explode source data columns into tabular format’. Now we can get the data into a tabular form using an explode function. Replace the columns explicitly defined on line 9 which match up with your chosen Log Analytics function output schema
import org.apache.spark.sql.functions._ val explodedDf = sourceDf.select(explode($"tables").as("tables")) .select($"tables.columns".as("column"), explode($"tables.rows").as("row")) .selectExpr("inline(arrays_zip(column, row))") .groupBy() .pivot($"column.name") .agg(collect_list($"row")) .selectExpr("inline(arrays_zip(timeGenerated, userAction, appUrl, successFlag, httpResultCode, durationOfRequestMs, clientType, clientOS, clientCity, clientStateOrProvince, clientCountryOrRegion, clientBrowser, appRoleName, snapshotTimestamp))") display(explodedDf) - Create a new code block called ‘Transform source data’. We need to add some datapoints to our data frame to help with partitioning efficiently so when our dataset grows as more pipeline executions occur; we minimize performance bottlenecks where possible. In this case, we also want to add the ADF pipeline run id to help with troubleshooting if there are data quality issues in the final destination.
import org.apache.spark.sql.SparkSession val pipelineRunIdSparkSession = SparkSession .builder() .appName("Pipeline Run Id Appender") .getOrCreate() // Register the transformed DataFrame as a SQL temporary view explodedDf.createOrReplaceTempView("transformedDf") val transformedDf = spark.sql(""" SELECT DISTINCT timeGenerated, userAction, appUrl, successFlag, httpResultCode, durationOfRequestMs, clientType, clientOS, clientCity, clientStateOrProvince, clientCountryOrRegion, clientBrowser, appRoleName, snapshotTimestamp, '""" + paramPipelineRunId + """' AS pipelineRunId, CAST(timeGenerated AS DATE) AS requestDate, HOUR(timeGenerated) AS requestHour FROM transformedDf""").toDF display(transformedDf) - Create a new code block called ‘Write transformed data to delta lake’. To keep track of history in our fact data, we can make use of the Delta Lake functionality in Azure Databricks. First we need to ensure that a database named logAnalyticsdb exists. Otherwise, the first line of code in the next block will create it for us. Whilst it’s not mandatory to use explicitly named databases in Databricks, it does make life much easier once there are many tables being saved. This avoids the ‘default’ database becoming a cluttered mess. This is a similar approach to organising a Microsoft SQL Server database where you would want to categorize tables into different schemas e.g. raw, staging, final instead of having everything in the dbo schema.
import org.apache.spark.sql.SaveMode display(spark.sql("CREATE DATABASE IF NOT EXISTS logAnalyticsdb")) transformedDf.write .format("delta") .mode("append") .option("mergeSchema","true") .partitionBy("requestDate", "requestHour") .option("path", "/delta/logAnalytics/websiteLogs") .saveAsTable("logAnalyticsdb.websitelogs") val transformedDfDelta = spark.read.format("delta") .load("/delta/logAnalytics/websiteLogs") display(transformedDfDelta) - Create a new code block called ‘Remove stale data, optimize and vacuum delta table’. In order to control the size of the delta lake table, we must carry out the following steps. Firstly, delete any records older than 7 days. Then ‘optimize’ the table by performing a ZORDER function on the snapshotTimestamp column and condensing the data into as few parquet files as possible to improve query performance. Finally, we run a vacuum on it to ensure that only the required parquet files are kept. In this case, we want to keep 7 days worth of data. The syntax for the vacuum command expects the parameter expressed in hours. In our case, we are happy with the default setting of 7 days/168 hours so no parameter required in this case. Afterwards, we will show the delta history
import io.delta.tables._ display(spark.sql(""" DELETE FROM logAnalyticsdb.websitelogs WHERE requestDate < DATE_ADD(CURRENT_TIMESTAMP, -7) """)) display(spark.sql(""" OPTIMIZE logAnalyticsdb.websitelogs ZORDER BY (snapshotTimestamp) """)) val deltaTable = DeltaTable.forPath(spark, "/delta/logAnalytics/websiteLogs") deltaTable.vacuum() display(spark.sql("DESCRIBE HISTORY logAnalyticsdb.websitelogs")) - Create a new code block called ‘Create data frame for output file’. Now select the required datapoints from the delta lake table we’ll need for the output
import org.apache.spark.sql.SparkSession val outputFileSparkSession = SparkSession .builder() .appName("Output File Generator") .getOrCreate() val outputDf = spark.sql(""" SELECT DISTINCT timeGenerated, userAction, appUrl, successFlag, httpResultCode, durationOfRequestMs, clientType, clientOS, clientCity, clientStateOrProvince, clientCountryOrRegion, clientBrowser, appRoleName, requestDate, requestHour, pipelineRunId FROM logAnalyticsdb.websitelogs WHERE pipelineRunId = '""" + paramPipelineRunId + """' """ ) display(outputDf) - Create a new code block called ‘Create output file in data lake’. Let’s save this output to our data lake
import org.apache.spark.sql.functions._ val currentDateTimeLong = current_timestamp().expr.eval().toString.toLong val currentDateTime = new java.sql.Timestamp(currentDateTimeLong/1000).toLocalDateTime.format(java.time.format.DateTimeFormatter.ofPattern(dateTimeFormat)) val outputSessionFolderPath = ("appLogs_" + currentDateTime) val fullOutputPath = (dataLake + outputFolderPath + outputSessionFolderPath) outputDf.write.parquet(fullOutputPath) - Create a new code block called ‘Display output parameters’. We need to add one more code block of which will be an output parameter we will send back to Azure Data Factory so it knows which file to process
dbutils.notebook.exit(outputFolderPath + outputSessionFolderPath)
Set Azure Key Vault permissions for Azure Databricks
To allow Azure Databricks to read secrets stored in an Azure Key vault, explicit permissions must be specified for Azure Databricks through the use of an ‘Access Policy’.
NB – Azure role-based access control is the usual method for assigning permissions in Azure but we want very specific permissions which might be too broadly defined in a key vault RBAC role
- Open your Azure Key Vault in the portal and go to the Access Policies blade
- Click on +Add Access Policy

- Set the required permission level, in this case we only need to be able to Get and List secrets stored in the Key Vault from Azure Databricks, nothing more, nothing less.

- Finally, we need to specify the principal i.e. the identity of the authorized party that will be assigned these permissions. At the time of writing, each individual Databricks workspace is not assigned its own Azure Active Directory service principal. This means that you have to use the principal of the global Azure Databricks Enterprise Application within your Azure Active Directory. To select this principal click on None Selected next to Select principal. Search for AzureDatabricks, there should only be one entry. Select the item in the list and click Select. Once applied, click Add
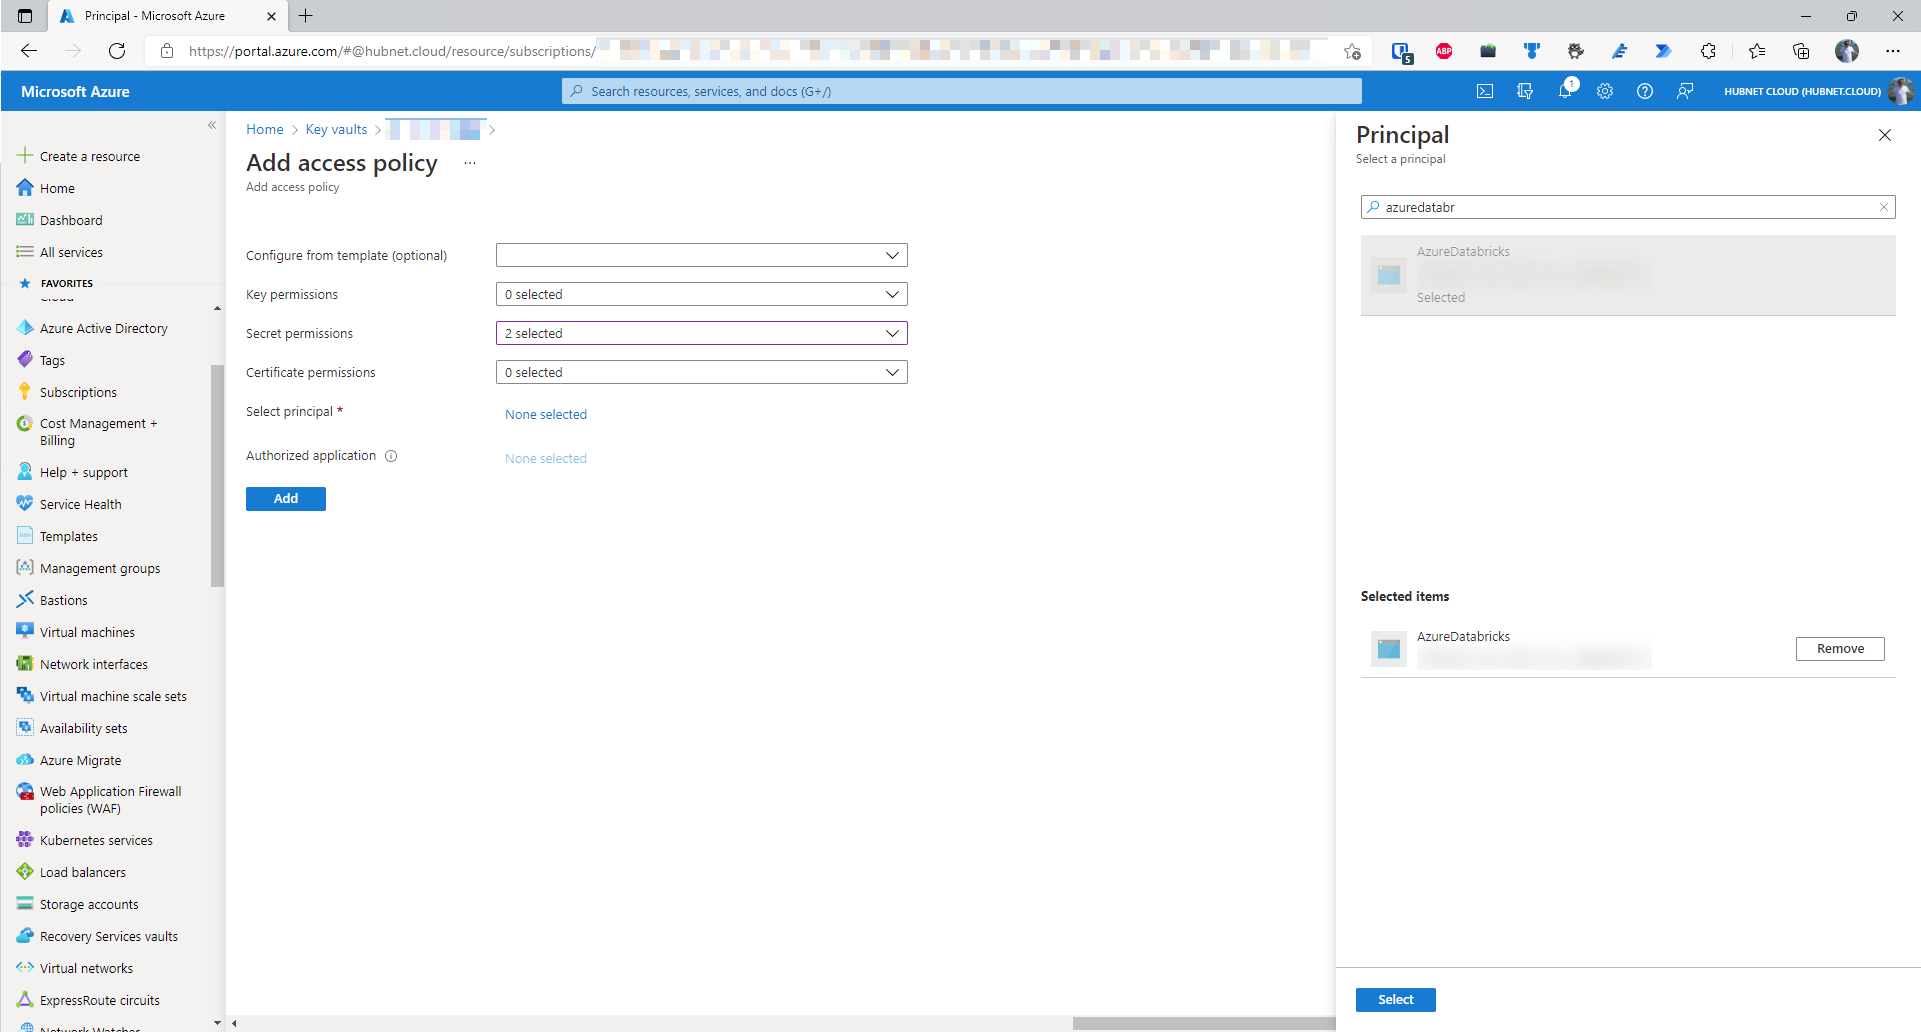 .
. - This will take you back to the Access Policies blade. Click Save for the changes to apply.
Create the secret scope in Azure Databricks
Now that we have created our permissions on the Key Vault for the global AzureDatabricks enterprise application, we have to configure our workspace to connect to the key vault to get its secrets by creating a secret scope
NB – You will need at least contributor permissions on the key vault itself to carry out this operation
- Open a new tab and navigate to your Databricks workspace. The URL should look something like https://adb-<workspaceid>.<randomid>.azuredatabricks.net/
- Add the following to the URL: #secrets/createScope so it reads https://adb-<workspaceid>.<randomid>.azuredatabricks.net/#secrets/createScope
- It is important to note that this URL extra path of the URL is case sensitive
- In another tab, navigate to your key vault in the Azure Portal and go to the Properties blade
- Note the following values
- Vault URI
- Resource ID
- Go back to your Databricks workspace tab with the secret scope creation page
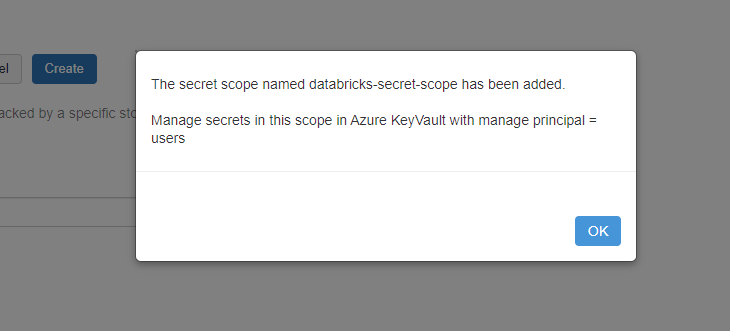
- Set the scope name to be what was defined on line 5 of part 4 of the notebook creation, in the example, I have used databricks-secret-scope. In more realistic scenarios where there are different environments such as Development, Test, Production & Quality Assurance you’d probably want key vaults scoped to each environment with a corresponding secret scope.
- In my example environment, I do not have a requirement for the highest levels of security so I will allow all users the ability to manage the principal in the below dropdown.
- Paste in the Vault URI into the DNS Name field
- Paste in the Resource ID into the Resource ID field
- Click Create
- Assuming that the user carrying out this operation had at least contributor permissions, you should be presented with the following message
Linking Azure Databricks to Azure Data Factory
Now that the Databricks environment is configured and ready to go, we need to firstly allow Azure Data Factory to access the Databricks workspace and then integrate the notebook into our Azure Data Factory pipeline
Giving Azure Data Factory permissions on the Azure Databricks workspace
- In a new tab, navigate to the Azure Databricks workspace in the Azure Portal
- Go to the Access control (IAM) blade
- Click Add
- Click Add role assignment
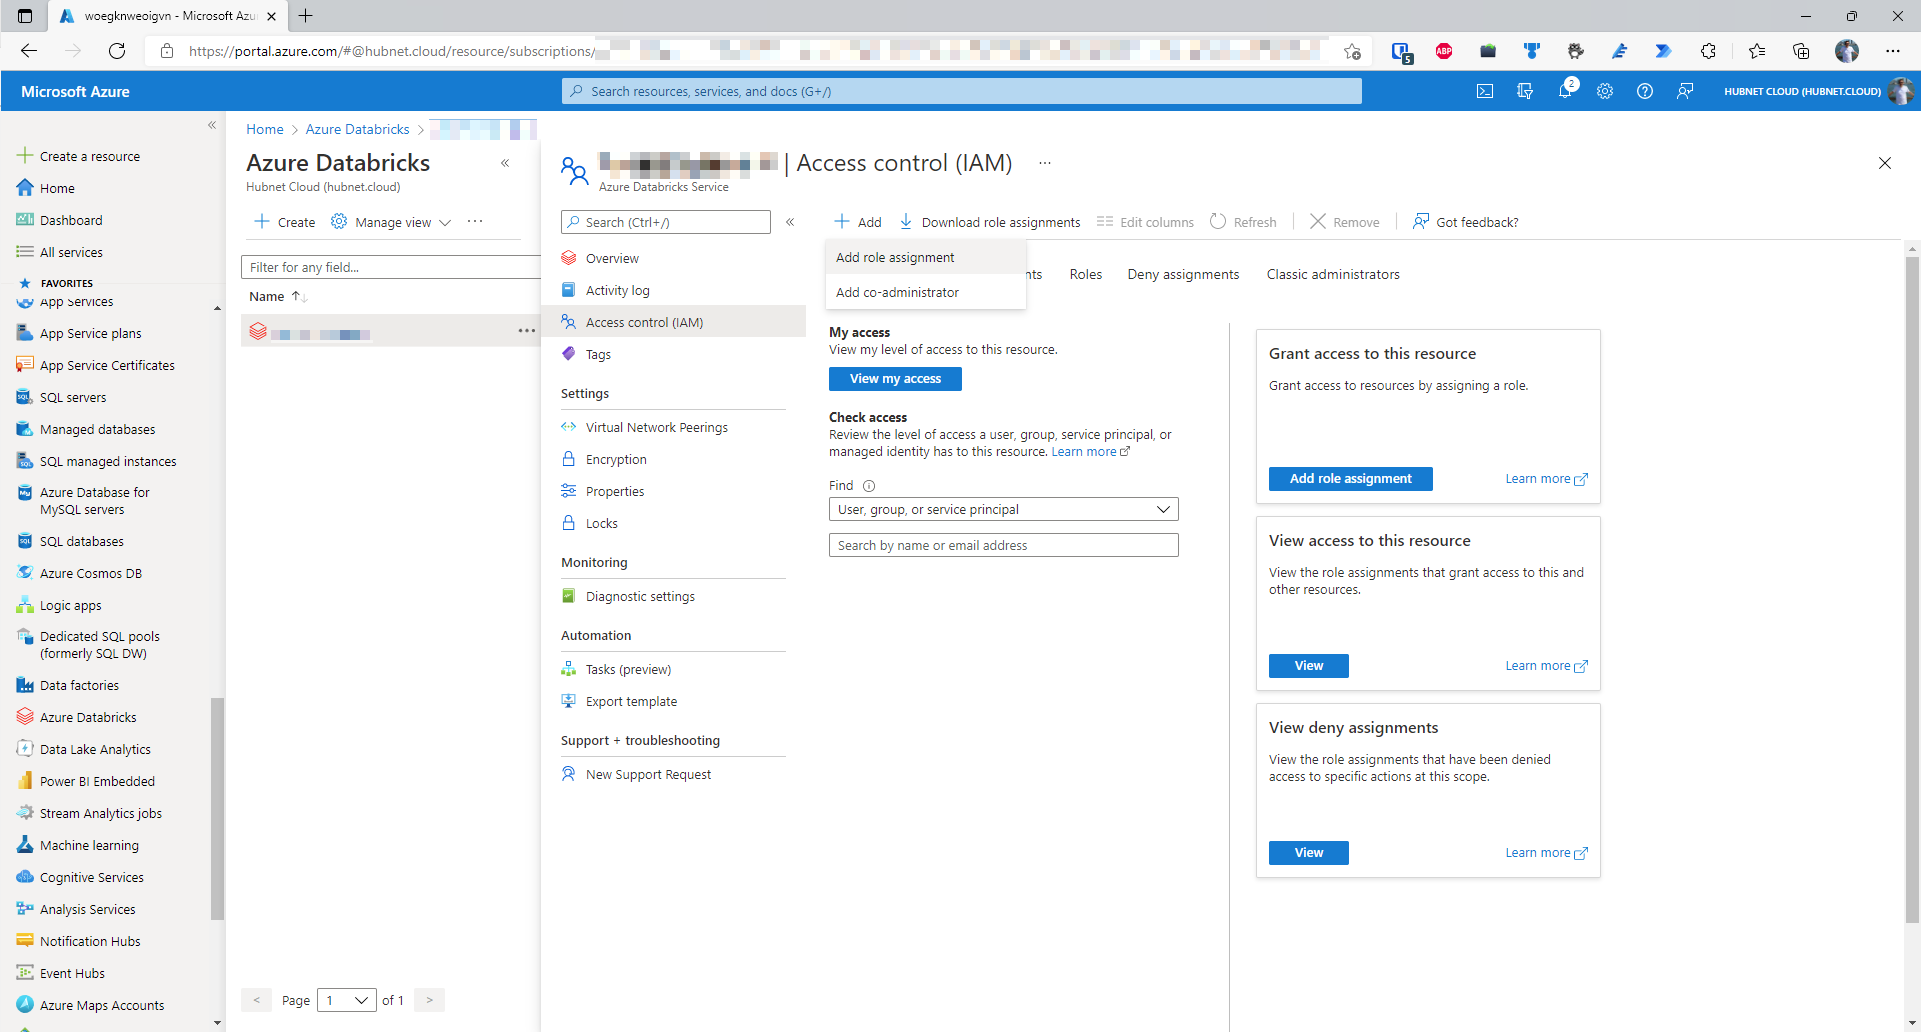
- Click on the row in the list that has the name Contributor – Unfortunately, Azure Databricks does not have a set of specific roles just for Azure Databricks so the generic contributor will have to do
- Click Next
- Under the Members tab, set the radio button next to Assign access to, to be Managed identity
- Click on + Select members
- Find your Azure Data Factory instance by selecting the correct subscription and then filter by managed identity type. In this case it is Data factory (V2)
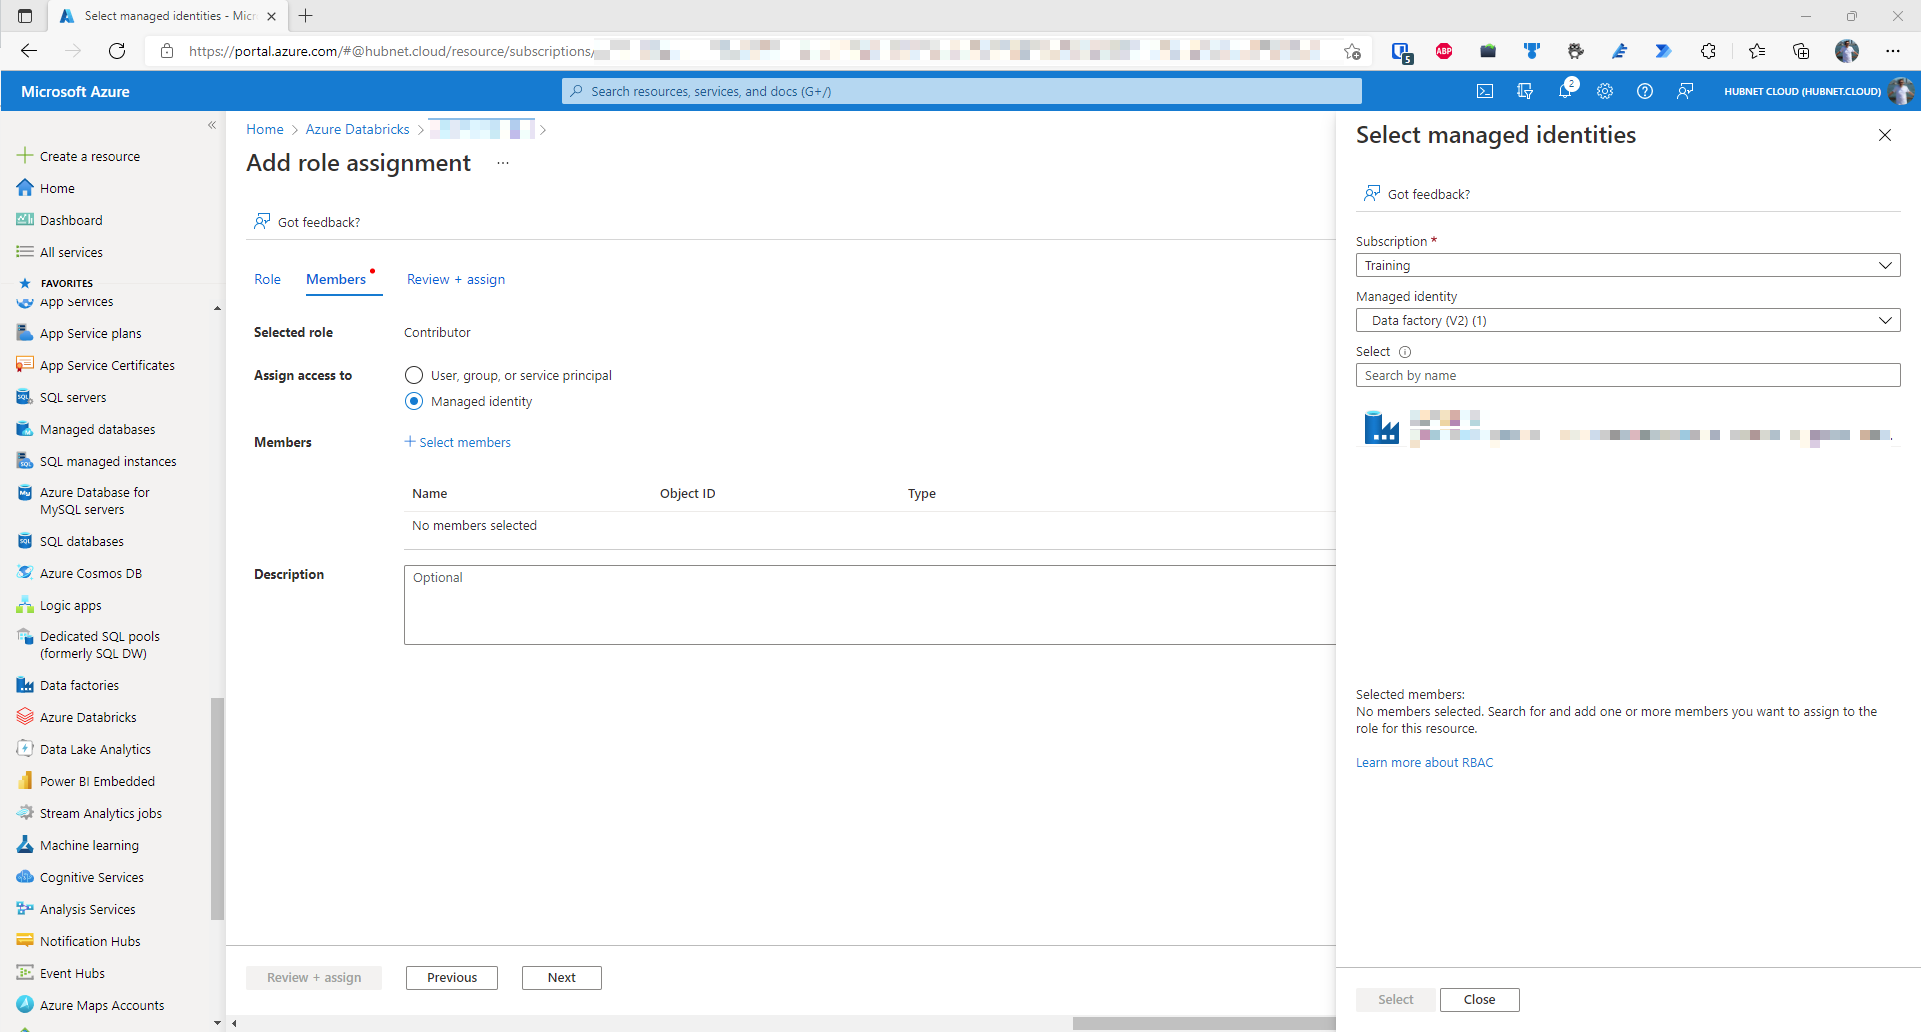
- Select the correct data factory and then click on Select
- Click Review + assign and then Assign to complete the process
Add Azure Databricks as a Linked Service in Azure Data Factory
- In a new tab, open your Azure Data Factory studio you have been using for this exercise.
- Click on the
 icon
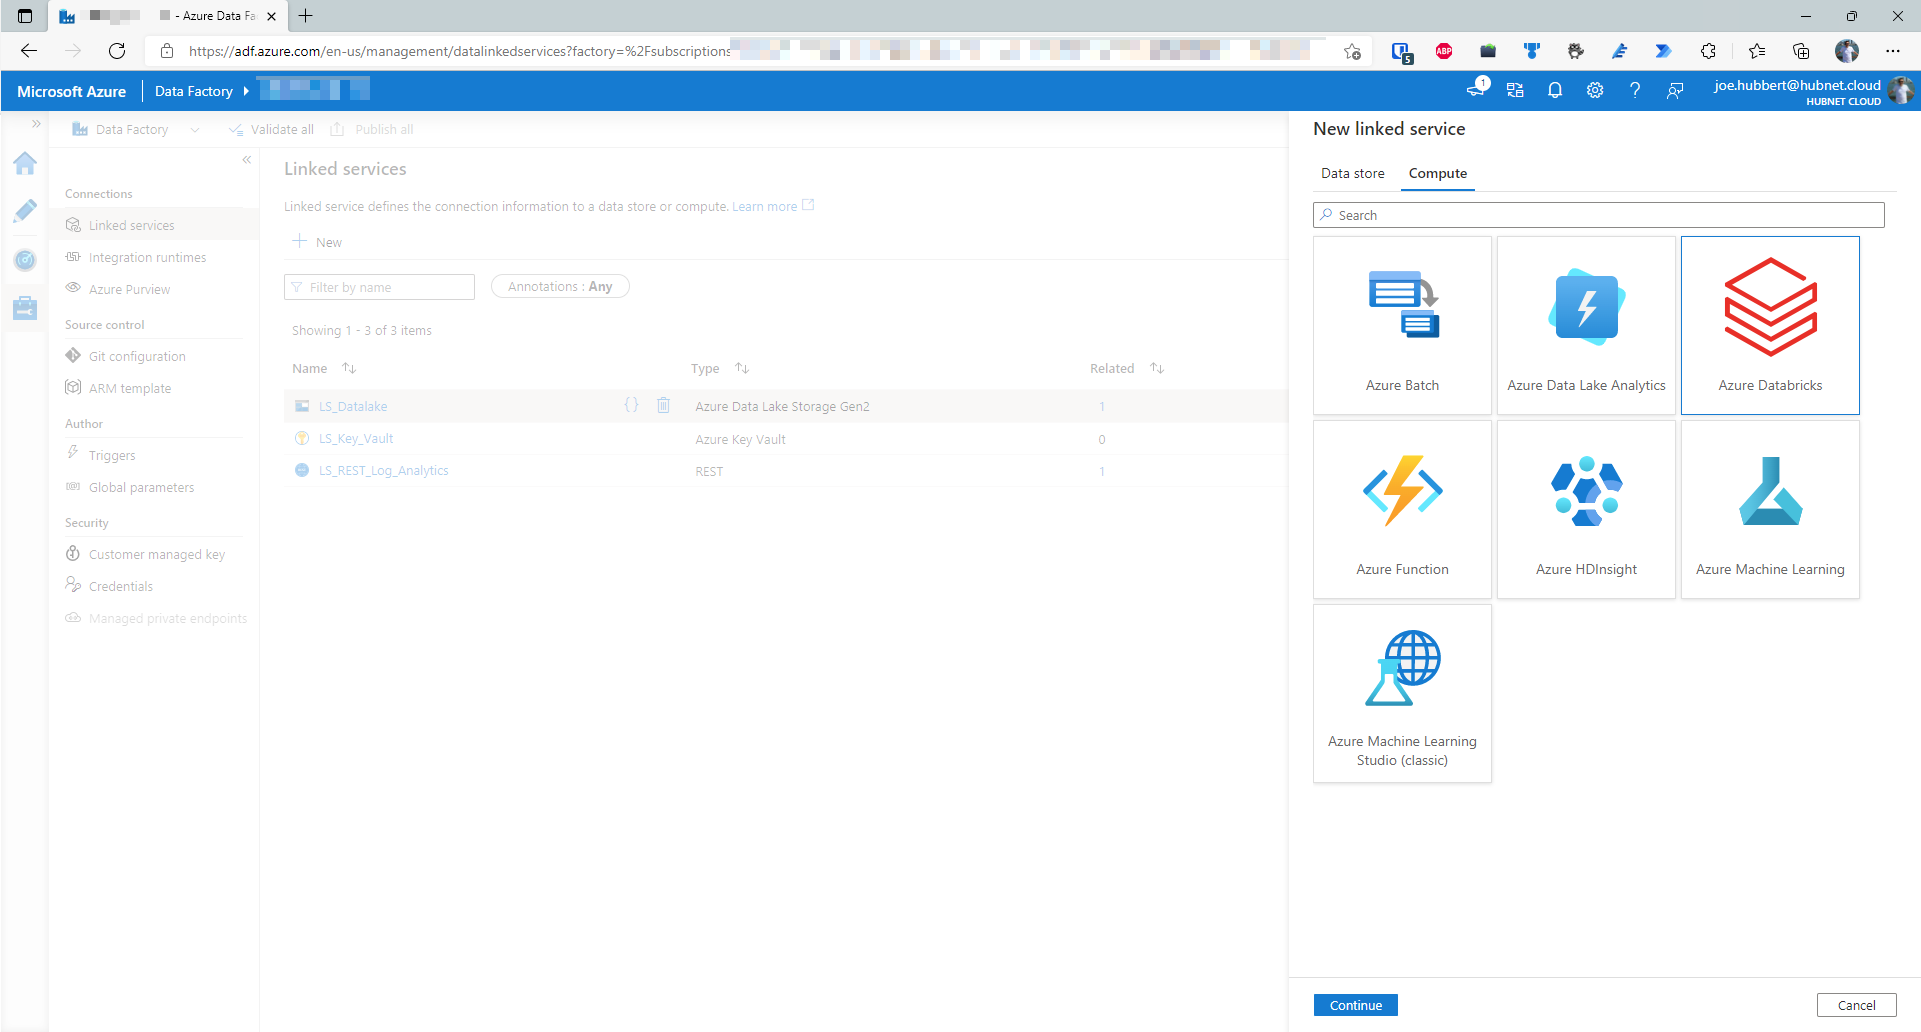
icon - Click on the Linked services blade
- Click on + New
- Click on the Compute tab and click on Azure Databricks and then click Continue
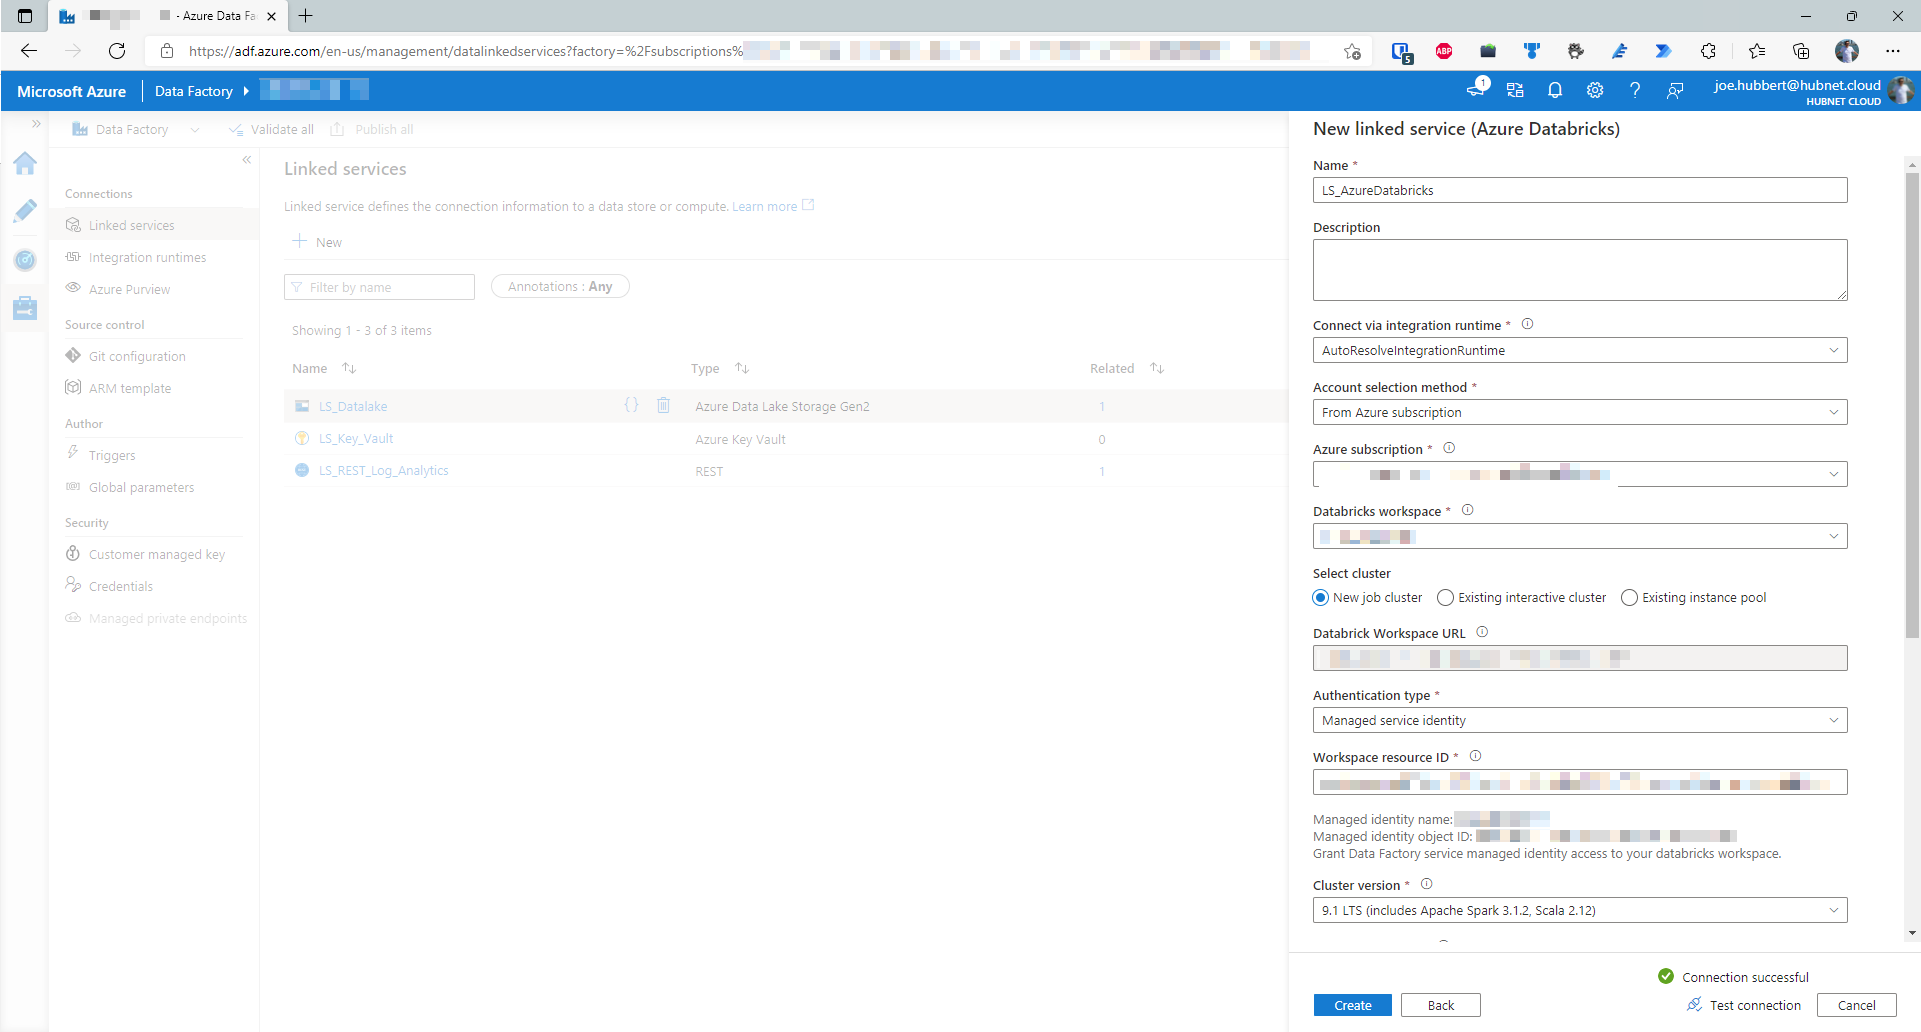
- Name the linked service LS_AzureDatabricks or whatever your chosen name is using your own naming convention
- Configure as so:
- Use the default Integration runtime (AutoResolveIntegrationRuntime) unless you have a specific requirement to use another
- Choose From Azure subscription in the dropdown for account selection method
- Select the correct Azure subscription and then you will be able to choose the correct workspace
- For cluster type, we want to use a new job cluster to save on cost.
- Authentication type shall be Managed service identity
- The workspace resource id should be prefilled
- Cluster version – 9.1 LTS. There is a breaking change introduced in Spark 3.2 that breaks the code shown in step 6. Please use Databricks 9.1 LTS Runtime
- Standard_DS3_v2 should be suitable for the cluster node type
- Python version 3
- Autoscaling workers, min 1, max 2
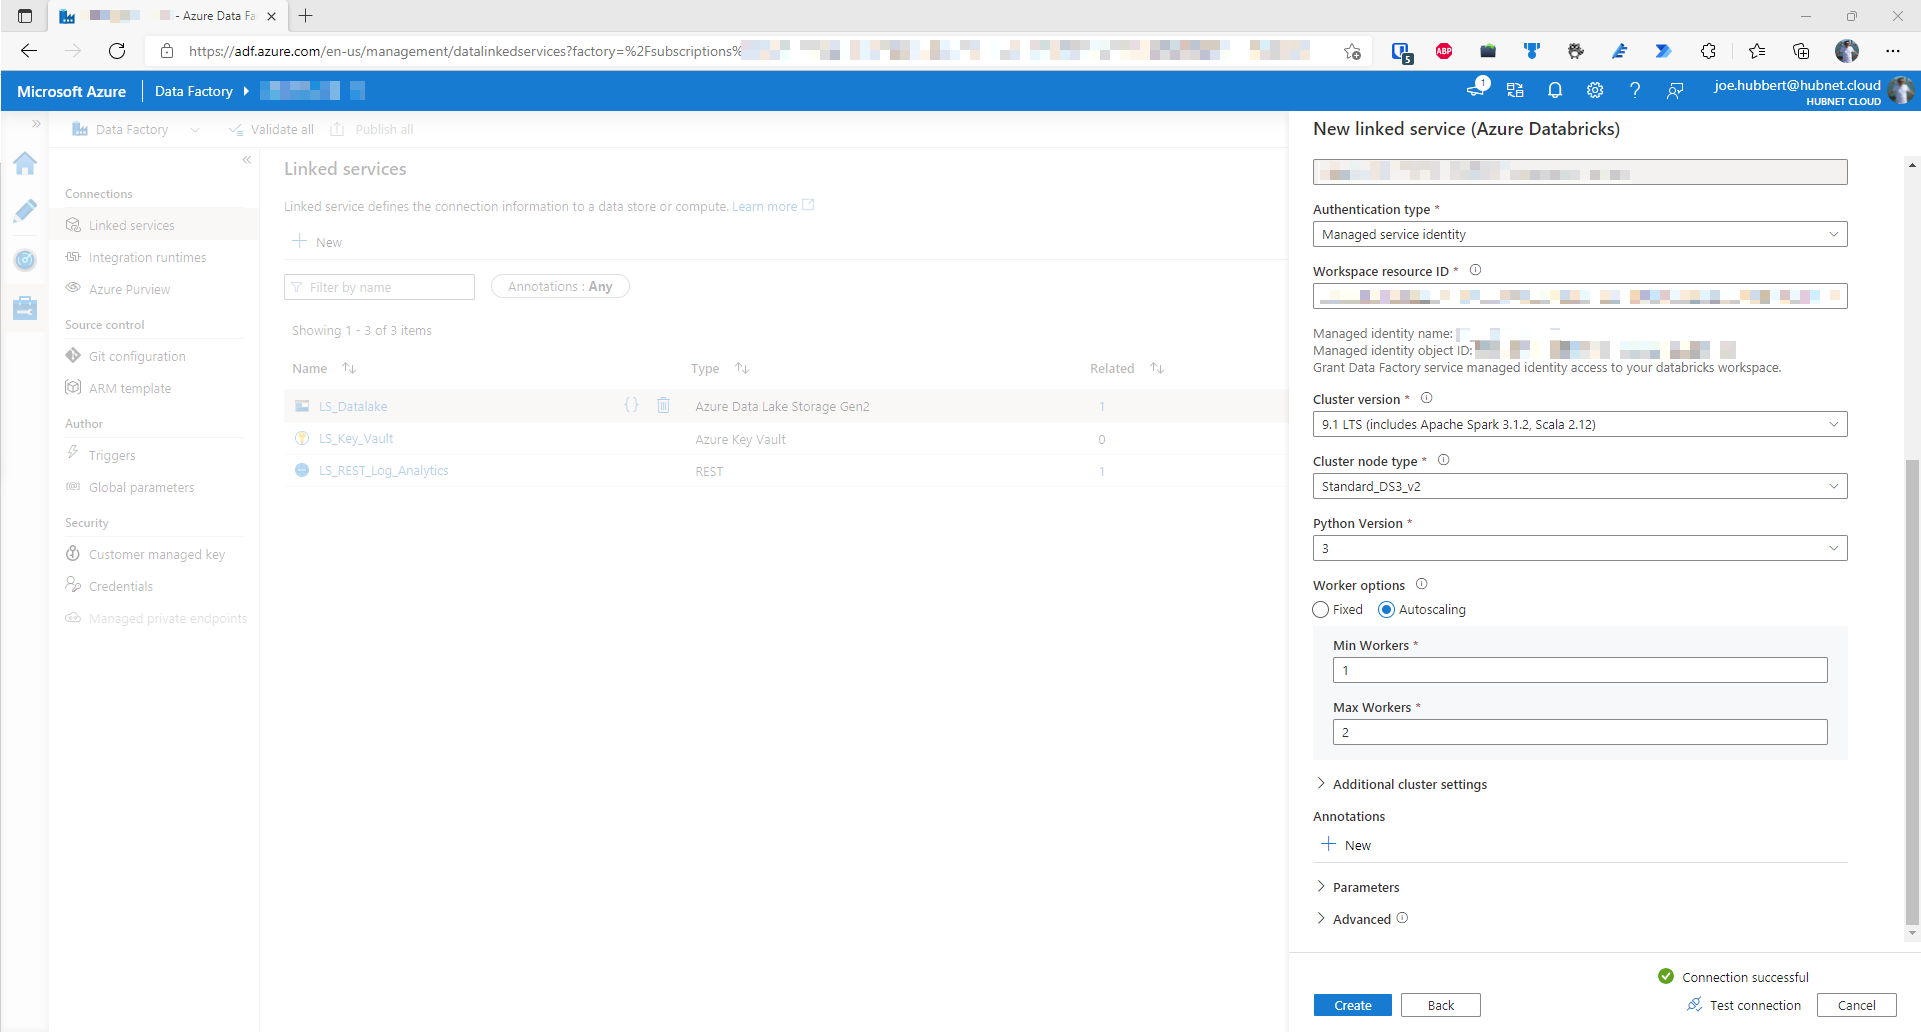
- Click Test connection to ensure it is working
- Click Save
- Click Publish all

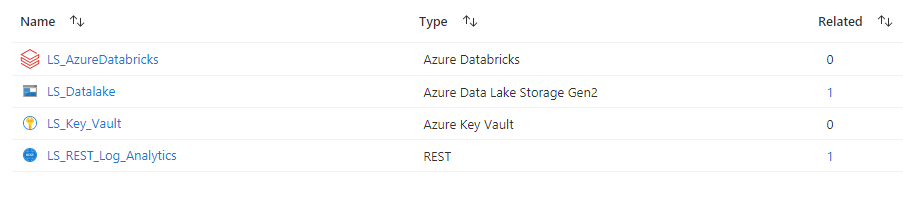
- You should now see LS_AzureDatabricks in your list of linked services
Adding the Azure Databricks notebook to the existing Azure Data Factory
- Go into author mode of Azure Data Factory studio by clicking on the
 icon
icon - Find the existing pipeline that was created previously and go into it
- Expand all activities
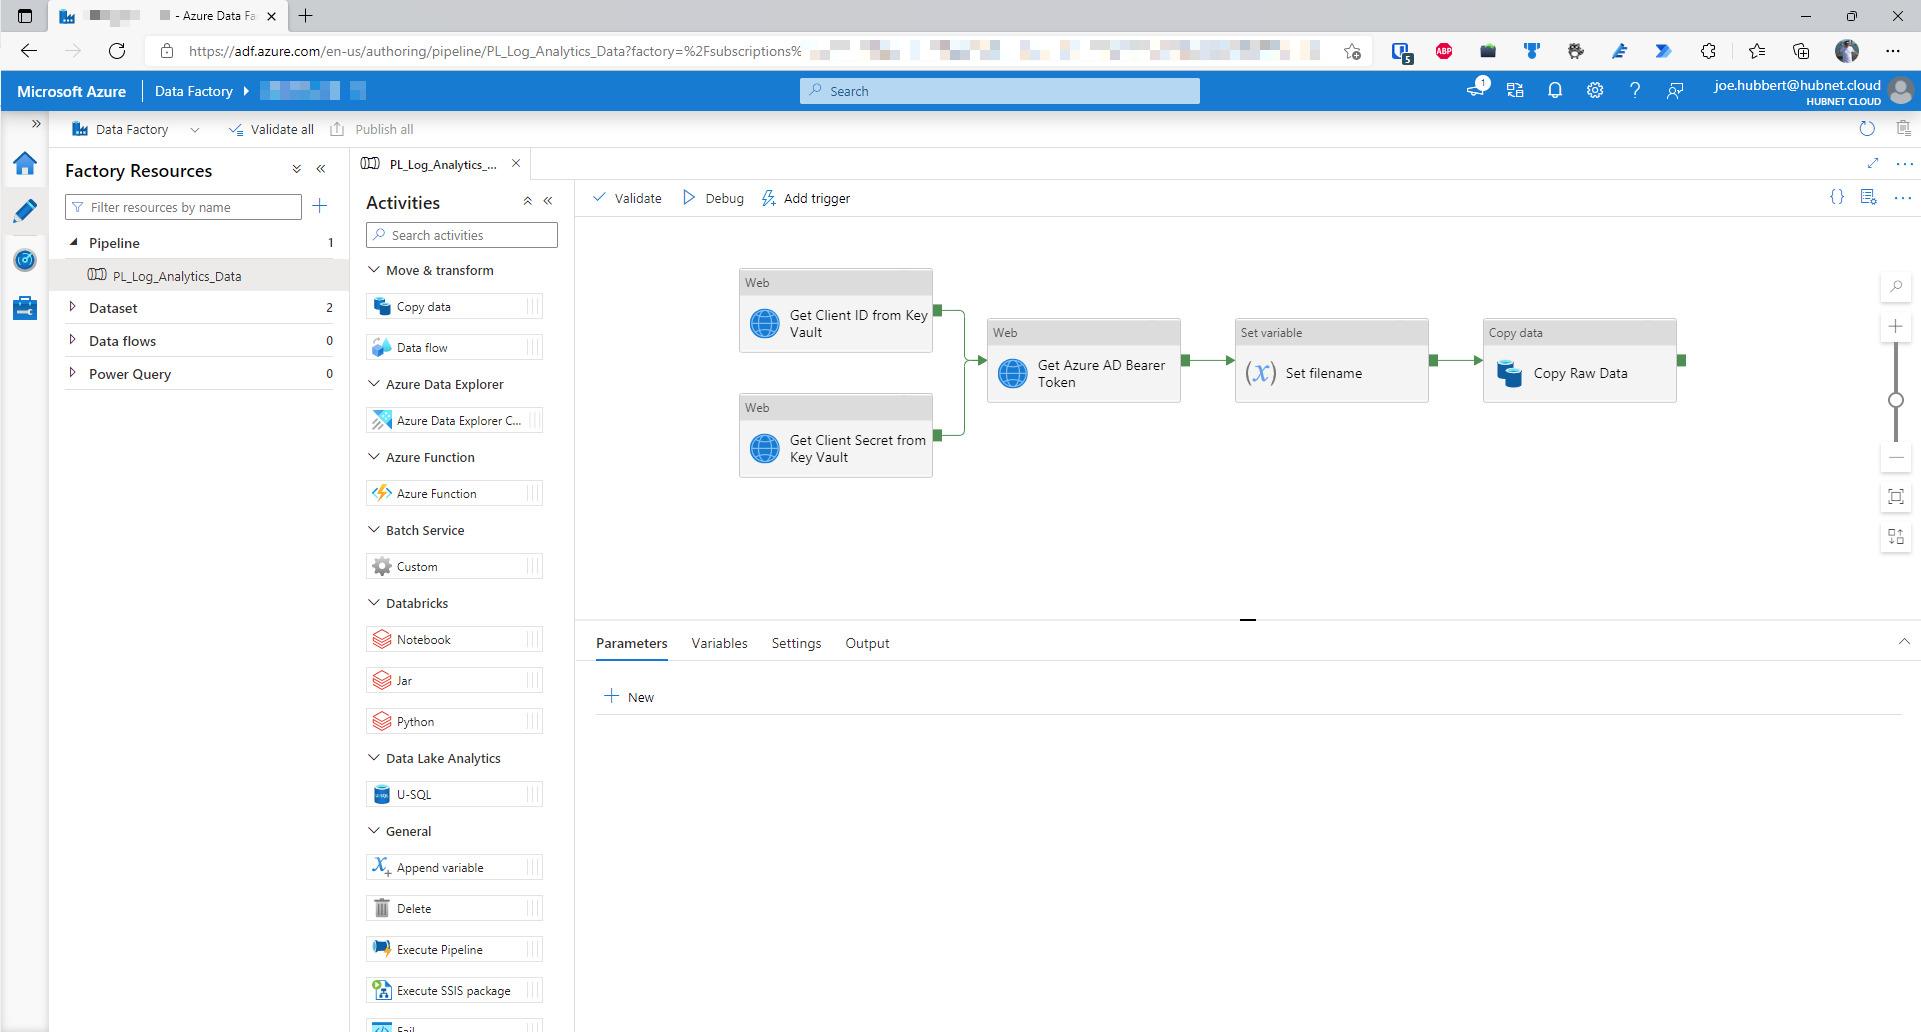
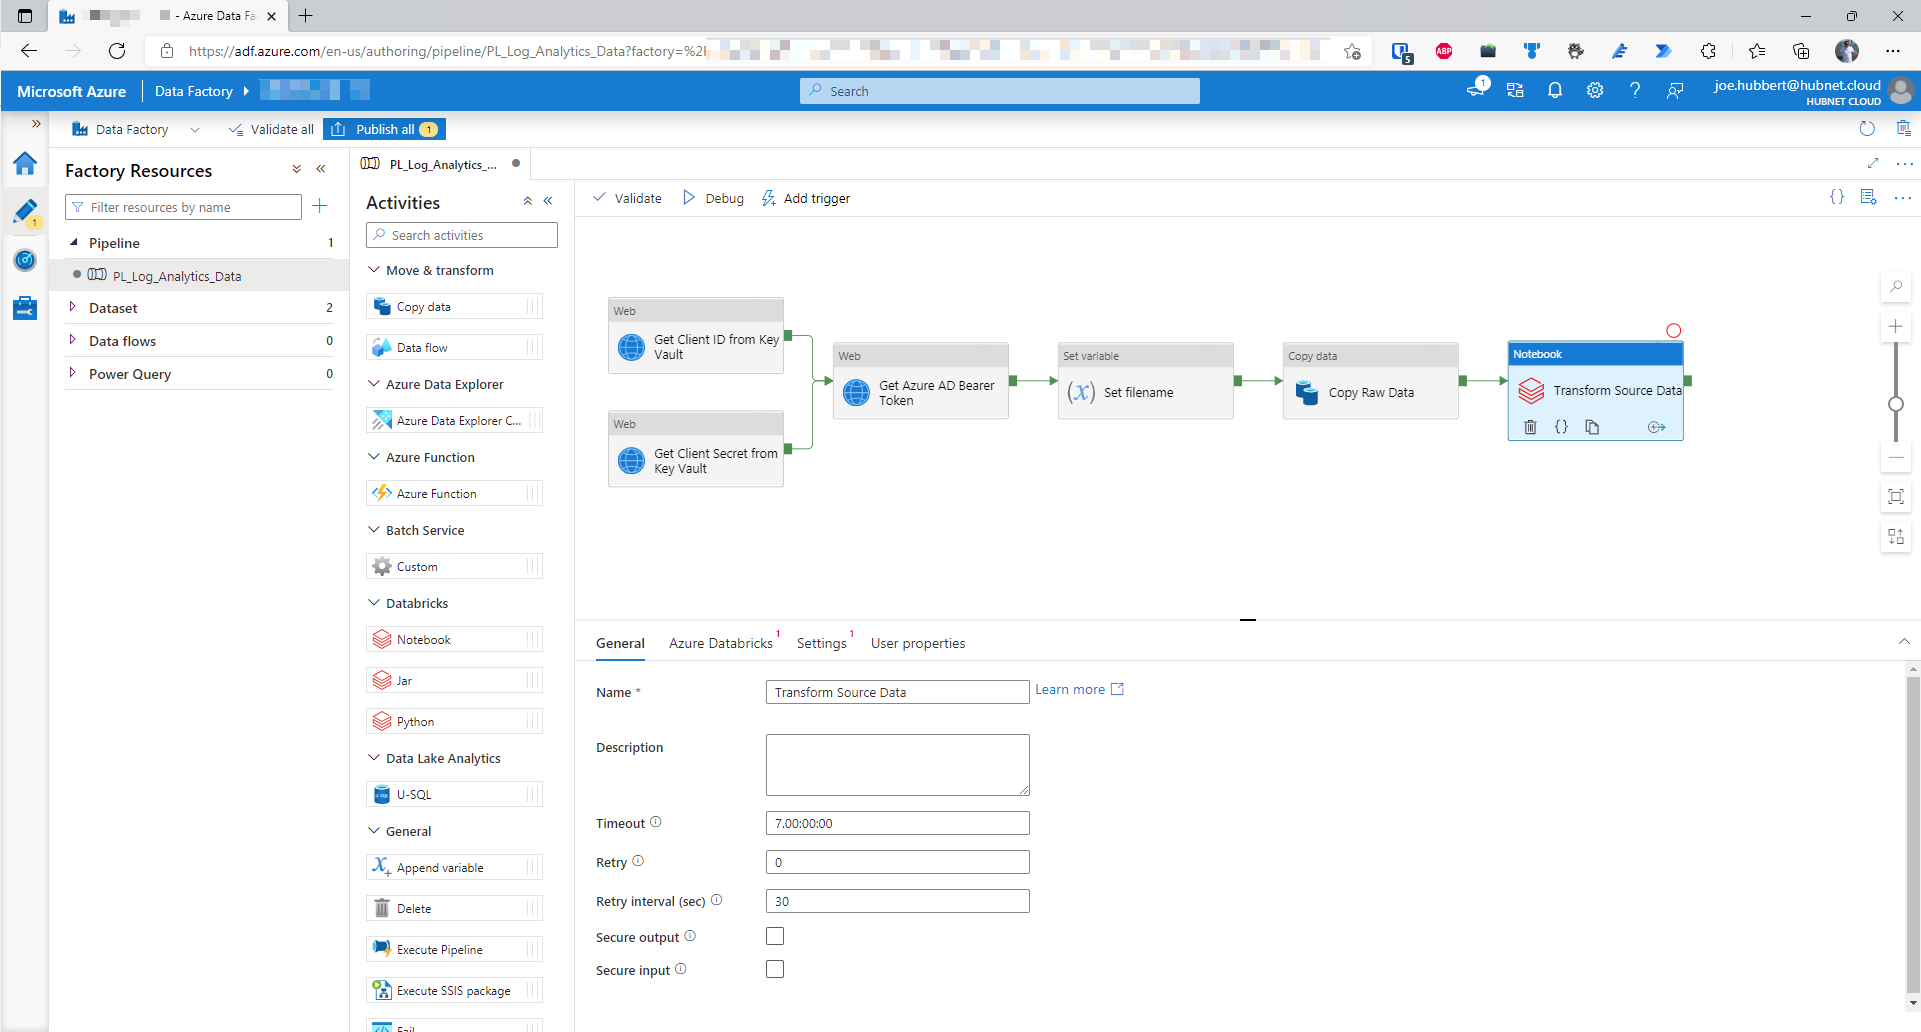
- Drag a Databricks Notebook activity into pipeline and add as a successor activity to the Copy Raw Data activity; when this has been successful. Call this activity Transform Source Data
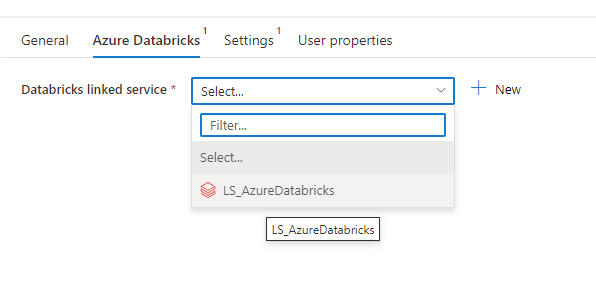
- Click on the Azure Databricks tab to associate the activity with the newly created linked service
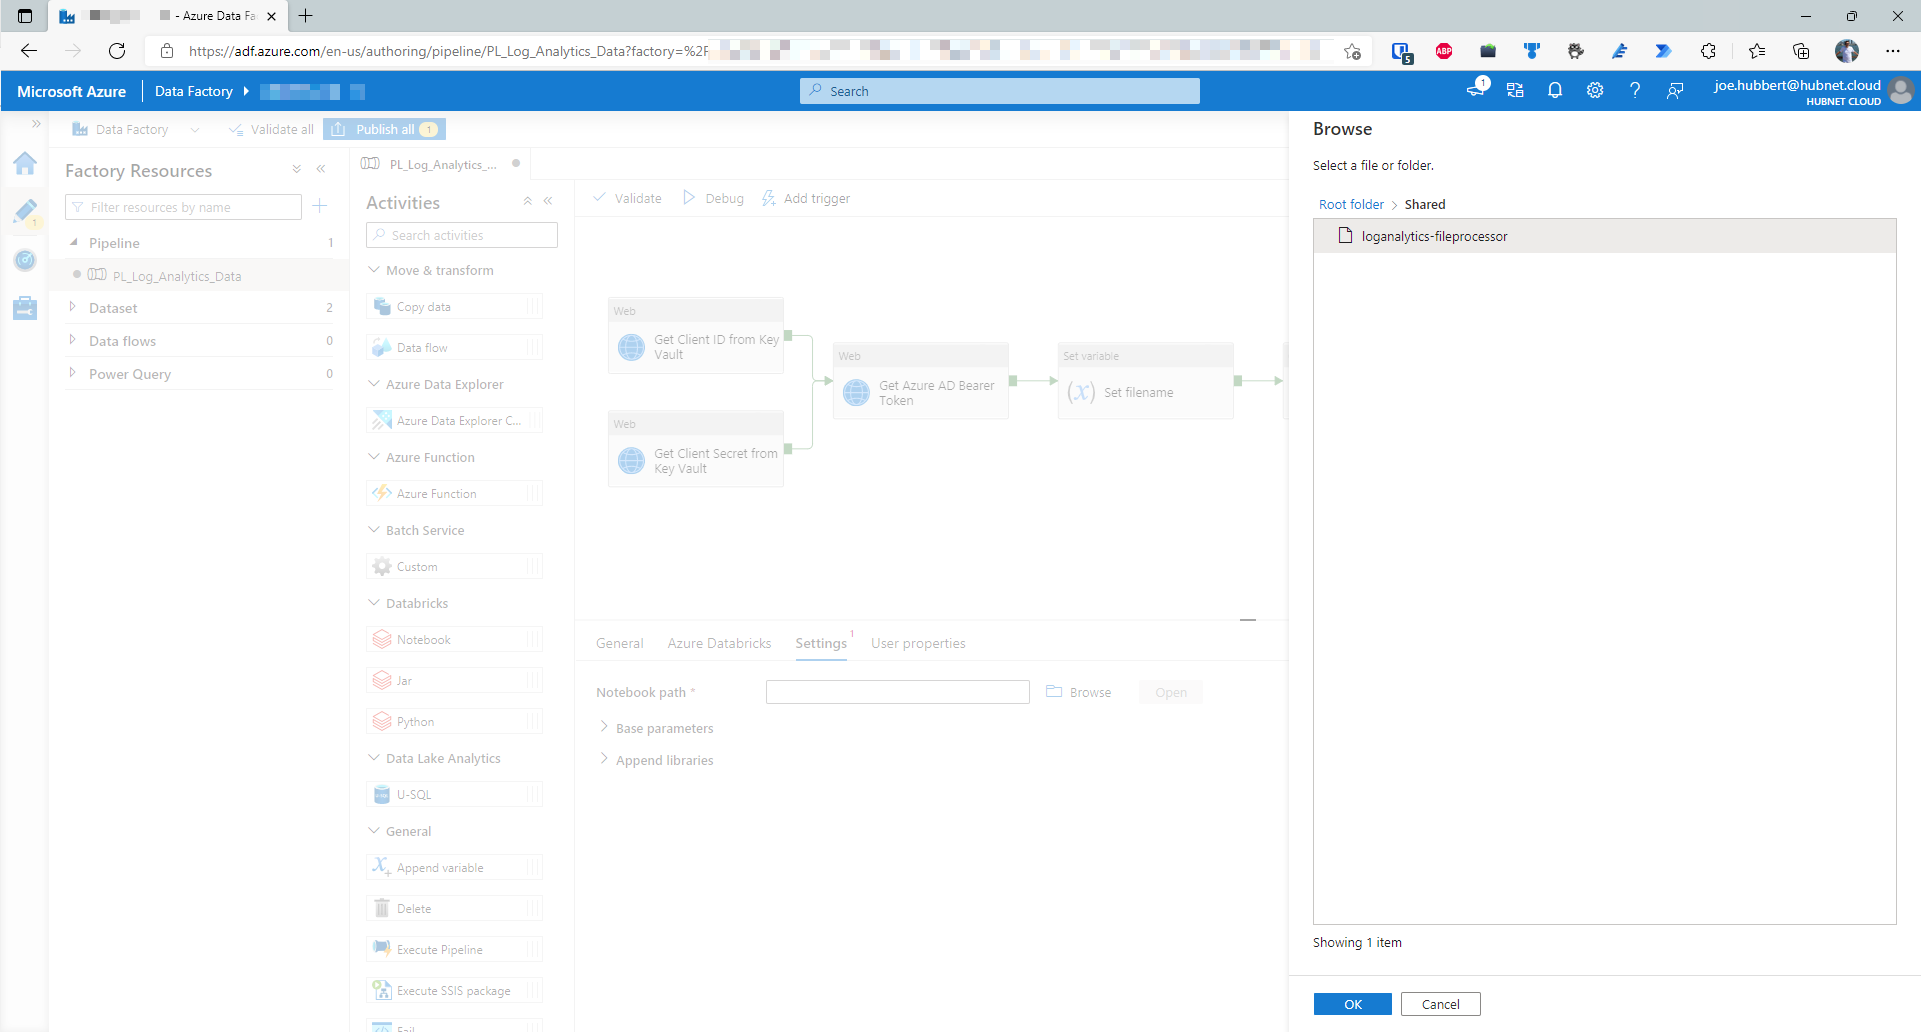
- Click on the Settings tab and then click Browse
- Search for the notebook that we saved earlier and click OK
- Finally, we need to set some base parameters for the Databricks activity for the folderPath and the pipelineRunId to be passed into the notebook on execution
- Expand Base parameters
- Click +New twice
- Name the first parameter filename
- Assign the the value of type dynamic content with the following code
@variables('filename') - Name the second parameter pipelineRunId
- Assign the value of type dynamic content with the following code
@pipeline().RunId
- Click the Publish all button
- Debug your pipeline to make sure all is working. Note – If your source dataset is large, then your Databricks notebook may take a few minutes to process after the cluster has been created. I noticed a bottleneck on the step where data is saved in the delta lake. It may be worth increasing the amount of workers available to your job cluster but to do this you need to ensure that your Azure subscription has the correct quota available for cores for the VM Series you are using for your Databricks cluster as most VM Series have a default of 10 cores. You can request a quota increase by submitting a support request.
Summary
There we have it, we have made the Databricks notebook to process the log analytics data and have integrated this notebook into our existing Azure Data Factory pipeline.